Laying Methods

DRY LAYING ON GRASS
On a grassy surface, installation is carried out by dry laying the slabs over grass without any adhesives.
INSTALLATION OVER GRASS COULD BE DONE IN TWO WAYS:
1_ ON GRAVEL BASE
- Remove the grass underneath the 20 mm tile.
- Dig for a depth of upto 5 cm during warm and dry climate or deeper during cold and wet seasons.
- Compact the soil which will come under the tile.
- Fill the excavated area with gravel (sized 4-8 mm) or sand and compact it.
- Lay the dry 20 mm tile over this prepared area.
2_ DIRECT
Place the tile on grass ensuring that a wide gap of 4-5 cm is left between two tiles for fresh grass to grow. In the Direct route too, the results are long-lasting, but the tile stability is subjected to soil conditions and movements.
LAYING ON SCREED WITH ADHESIVE
20 mm Outdoor Porcelain Rio Stone tile can be fixed over screed to create floor with high technical performance. Such surfaces are suitable for use in exceptionally high stress applications like vehicular traffic etc.
HOW TO INSTALL ON SCREED
- Dig up the soil and compact the ground over which tiles will be laid.
- Place a layer of crushed stones and gravel as base.
- Place the slab including optional steel mesh.
- Install the 20 mm tile with the help of exterior grade elastic adhesive.

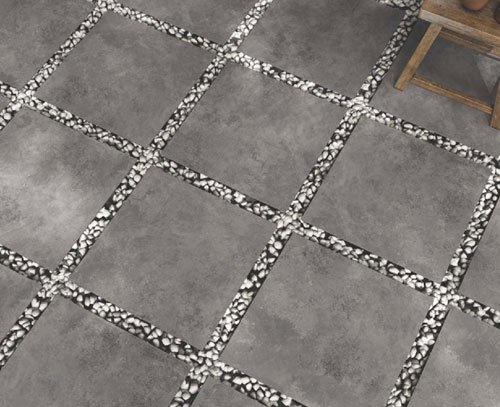
LAYING ON GRAVEL
The 20 mm tile is a multi-functional solution capable of adapting to the ground. Besides, allowing the development of large surfaces over gravel, it also reduces the occurrence of joints making the surface appear seamless.
HOW TO INSTALL
- Dig the soil atleast for 10 cm during warm and dry weather or deeper in cold or wet climate.
- Compact the soil at the base and ensure that it is leaning (>=2%) to avoid stagnation of water.
- Optional - Place a layer of geotextile for additional strength
- Place a layer of crushed stone and gravel (size 4-8 mm) and compact it well.
- Place a layer of fine gravel or sand (size 2-5 mm) to achieve a fairly levelled surface.
- With a Straight-Edge, ensure that that the surface is levelled correctly. A minor gradient (>= 1%) is recommended to achieve proper drainage of water.
- On this surface, place 20 mm tiles leaving a gap of 2 mm at joints for expansion. Tile spacers could also be used to ease installation. Level the surface with a Straight Edge and use a rubber hammer to rectify the minor height differences, if any.
- Fill the joints with very thin layer of sand (Size 0-3 mm) or polymeric sand.
OUTDOOR LAYING ON RAISED FLOORING
On terraces or accessible aflics, it is possible to build raised level flooring that even allows for rainwater drainage. After the slab and its sloping screed are complete, install the waterproofing membrane. Position the pedestal according to the desired size and use the slope corrector, if necessary. During the installation process, correctly adjust each pedestal to achieve a smooth flat floor.


DRY LAYING ON SAND
It is possible to easily create walkways and installations on sandy grounds with minimal effort.
INSTALLATION ON SAND CAN BE DONE IN TWO WAYS:
1_ON SUBSTRATE, ALLOWING THE STABILITY TO IMPROVE GRADUALLY.
- Dig about 20 cm in the sandy ground.
- Place crushed stone or gravel layer (size 4-8 mm) and compact it.
- Then add a 2 cm sand layer.
- Dry lay 20 mm tile over this prepared surface.
2_ DIRECTLY
- Level and compact the sane beneath.
- Dry laying the 20 mm tile.
Laying Patterns
Make natural looking patterns like interlocking,
Random, repetitive, squares with
Rio stone outdoor porcelain
